
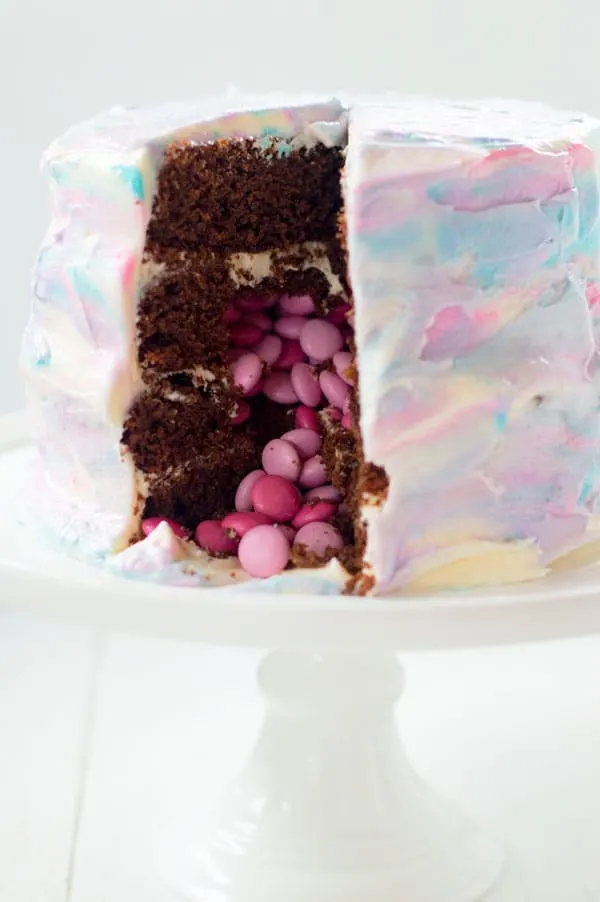
If you’re expecting or planning a gender reveal party then this easy marble gender reveal cake is perfect!


I currently have 3 very special people in my life expecting little bundles of joy. And even though I have no interest in having children of my own one day I do love babies. I love to cuddle them, play with them, sing to them, chatter with them, and give them back to their parents 😉
Aside from my cousin who’s expecting her first two very dear blogger besties are expecting babies two and three. Mary from Goodie Godmother wants to be surprised but Jennifer from Jennifer Meyering found out she’s having a sweet baby girl! This kind of sparked a discussion with a few friends about whether or not they’d want to know the gender of their babies and what fun gender reveal ideas they had.

I’m super into cakes right now for whatever reason and so when we decided to throw Jenn a virtual baby shower before Baby Girl arrives in November I knew I was going to make a cake. And after seeing a super simple and fun marble cake technique on YouTube I really wanted to try it! On a totally unrelated note this cake would also be perfect for a unicorn themed bash. Just throwing that out there…
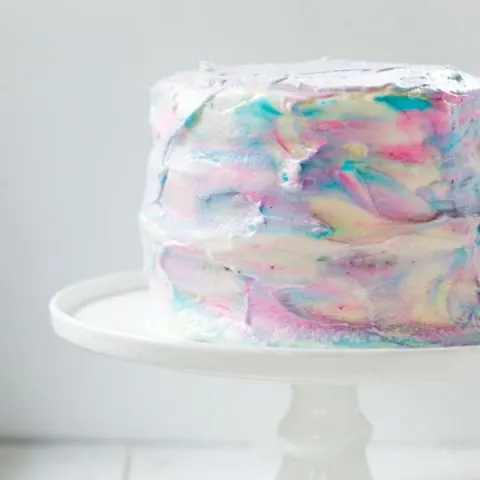
All it takes to make those sweet pink and blue marbled swirls is to pipe lines of pink and blue frosting over your already frosted cake and smooth with a spatula. Presto! Just be careful not to smooth too much otherwise you cross the line from marbled pink and blue to purple. Which is fun in it’s own right but not exactly fitting with the gender reveal thing I was going for. Fill your cake with whatever colored candies you like. I opted for a couple shades of pink M&Ms after being totally overwhelmed by the choices at Party City. Seriously, I didn’t know candy came in so many colors!


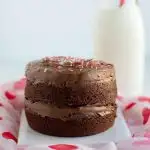
Easy Marble Gender Reveal Cake
Ingredients
For the Cake
- 1 cup sugar
- 1/2 cup cocoa powder
- 3/4 tsp baking soda
- 3/4 tsp baking powder
- 1/2 tsp salt
- 1 cup flour
- 1/2 cup vegetable oil
- 3 large eggs
- 3/4 cup Greek yogurt
- 2 cups pink or blue candies, about 1/2 a pound
For the Frosting
- 3 sticks butter, room temperature
- 6-7 cups powdered sugar
- 1 tsp vanilla
- Pink and blue gel food color
Instructions
- Sift sugar, cocoa powder, baking soda, baking powder, and salt into the bowl of a stand mixer.
- In a separate bowl beat together vegetable oil, eggs, and Greek yogurt until combined and slowly add into your dry ingredients with the mixer on low.
- Beat until combined, scraping down the sides of the bowl. Add flour and mix on low speed until completely incorporated.
- Divide batter evenly between 4 shallow 6 inch cake pans* and bake at 325 degrees for 15-18 minutes or until a toothpick inserted in the center comes out clean.
- Allow to cool in the pan for 5 minutes before turning out onto a cooling rack to cool completely.
- While your cakes are cooling make the frosting by beating the butter on a medium speed until pale and fluffy.
- Add in the powdered sugar one cup at a time mixing after each addition. Add in vanilla and mix well.
- Evenly distribute 1/2 cup of frosting into two bowls, coloring one pink and one blue.
To Assemble:
- Lay the first layer of your cake on your cake stand and frost in an even layer.
- Using a round 3" cookie cutter cut out a hole in the 2nd and 3rd layers of cake.
- Top the first layer of cake with one of your rings of cake and frost the top of the ring but not inside it, add the second ring and repeat, frosting the top but not the inside.
- Cut off a thin layer of one of the scraps of cake and lay it in the bottom of the hole to cover up the frosting. This will keep your candies from sticking to the frosting!
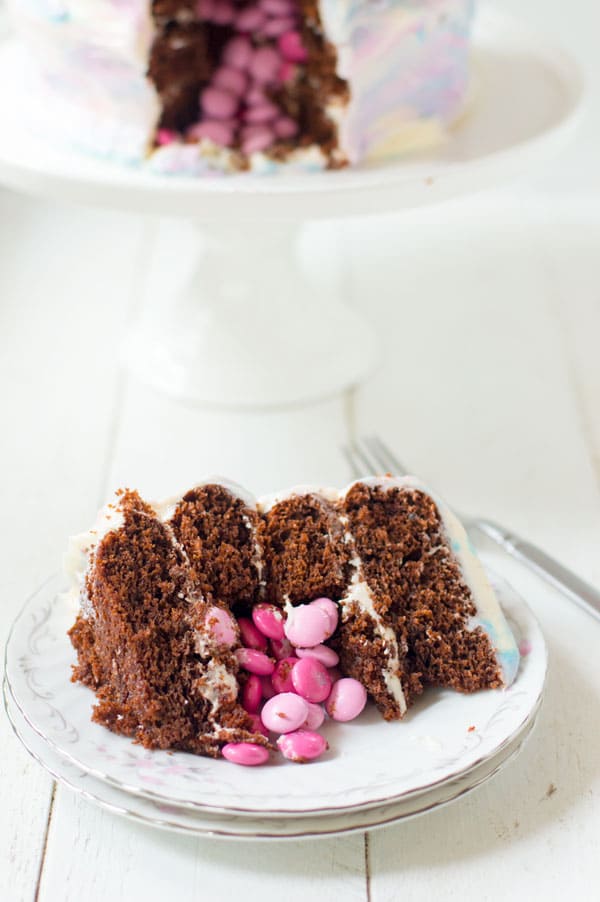
- Add your candies to the hole leaving just enough room to add another thin layer of cake on top of the candy. Frost and add the 4th layer.
- Crumb coat, chill, and frost your cake with the remaining white frosting.
- To create marble effect pipe pink and blue frosting onto the sides and top of your cake in lines then gently smooth with your spatula. Be careful not to smooth too much, you don't want to over blend the colors.
Notes
*You can also spread the batter evenly between two deep 6 inch cake pans and torte each cake so you have 4 layers.


Debbie
Friday 21st of April 2017
Hi❤ I want to make this for my friend....blue and pink icing in lines around or up and down? Also how did you get the raised icing on the sides? Just lifting the spatula outwards?????????
Meaghan
Saturday 22nd of April 2017
Horizontal lines around and I got the raised icing by using a straight icing spatula instead of an icing scraper or offset. You can add extra texture using the spatula wherever you like if you prefer that to a perfectly smooth finish.
~Meaghan
Simone
Thursday 17th of November 2016
I can't wait to attempt to make this! Still trying to figure out the technique to do the buttercream. Do you have the link to the youtube video that you used for inspiration? It looks amazing!
Meaghan
Friday 18th of November 2016
Sorry that I didn't explain this very well! Here's a link to the video where I originally saw the technique! https://www.youtube.com/watch?v=YsEQF8vgG8A
~Meaghan
Byron Thomas
Wednesday 12th of October 2016
So cute! I can see so many more possibilities with this type of cake too - it's a like a pinata that you can eat! I'm thinking themed parties - or even a Christmas cake with red and green m&ms. OHHHHH!
Meaghan
Friday 14th of October 2016
The possibility for pinata cakes are endless! I love how fun and festive they are :)
~Meaghan
Whitney
Tuesday 11th of October 2016
This is cute. Icing cakes always get the best of me, but I'm determined to get it right one day. I'm also down for a unicorn bash. Sounds fun.
Meaghan
Wednesday 12th of October 2016
I always try to make cake decorating as easy as possible because it's not my strong suit. All hail unicorn parties!
~Meaghan